Authored by Tim LeBlanc, Web Developer
Media editing tools are available when using the ‘Insert from Media Library’ icon on the CKEditor toolbar.
Please make sure to first select ‘Full HTML’ text format, which can be found beneath the Body field as an option within the ‘Text format’ dropdown field, all within a page’s node edit form.

Crop Tool
Please note before cropping an image: Cropping any image will crop every instance of that image on the site. So, if you’re selecting and using an existing image in the media library, and that image is already being utilized elsewhere on the site, it’s advised to upload a copy of the image (a second, identical image), before setting any crop definitions, that way the new crop definition does not affect any previous usages of that image.
When uploading images using the ‘Insert from Media Library’ tool within the CKEditor toolbar, content authors are now given the ability to crop uploaded images using a ‘Manual crop’ image style which is set to ‘arbitrary’, meaning the crop size is free-form and not confined to any size or aspect ratio.
Uploading an Image
- Using ‘Full HTML’ text format, within the Body field, click the ‘Insert from Media Library’ toolbar button.
- Click ‘Choose File’ and select image file to upload.
- Enter required Alternative text which concisely describes the image.
- Click the ‘Save and select’ button.
- Then click the ‘Insert selected’ button.
Cropping an Existing Image
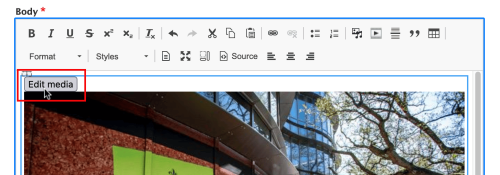
Click the ‘Edit media’ button of any existing image.
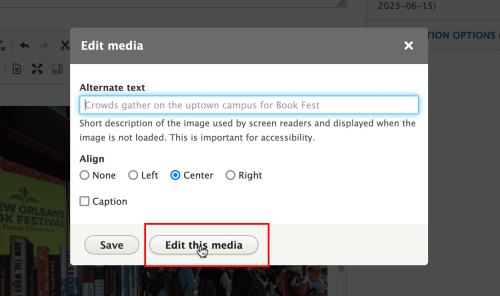
Within the Edit media modal, click the ‘Edit this media’ button.
In the Edit Image modal, you may need to scroll down to see the entire crop image thumbnail. Within the crop image thumbnail, you may click and drag the blue outline denoting the crop area. This may be set to any size and area that’s ideal for the image.
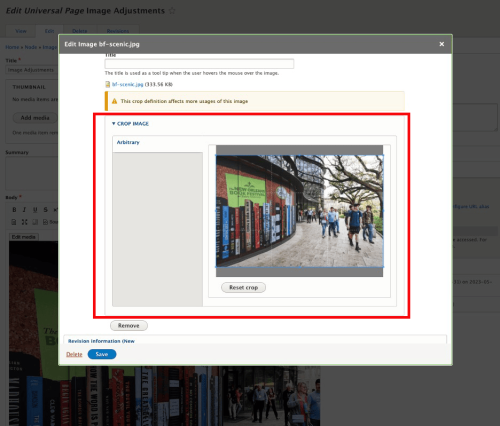
- You may remove any set crop definition by clicking the ‘Reset crop’ button.
Again, please note that the crop definition may affect any usages of the image, not just this one instance.
- Once you’re satisfied with the set crop definition, you may click the ‘Save’ button to add the affected image to the page.
Resizing an Image
Please note before resizing an image: Resizing any image will resize every instance of that image on the site. So, if you’re selecting and using an existing image in the media library, and that image is already being utilized elsewhere on the site, it’s advised to upload a copy of the image (a second, identical image), before resizing the image, so that the resizing does not affect any previous usages of that image.
The Resize tool is especially useful for reducing large, unedited image files to a more reasonable size, by setting an appropriate width in pixels, and then allowing the height field to conveniently auto-set to the corresponding aspect ratio.
- Upload an image.
- After going through the process of uploading the image, click the ‘Edit media’ button of uploaded image.
Within the Edit media modal, click ‘Edit this media’ button.

In the Edit Image modal, click the ‘Remove’ button to remove the image.
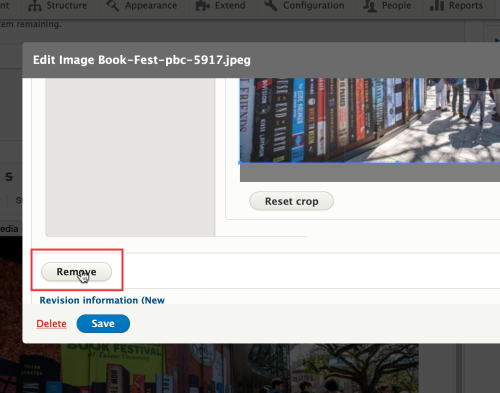
Now, the IMCE file browser option shows as ‘Open File Browser.’ Click ‘Open File Browser.’
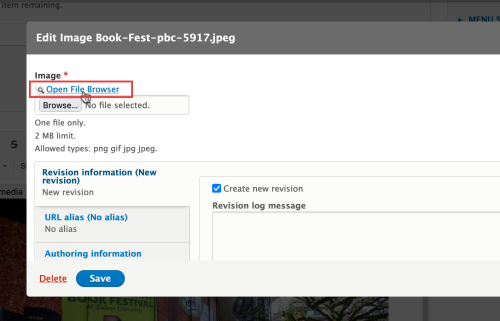
- Once within the file browser, wait for the public:// directory to load, it may take a minute. Once the directory loads, you may find the image you just uploaded by the image’s filename within the folder denoted with the current year and date of when the image was uploaded.
Select the image and click the ‘Resize’ button. Within the Resize popup, set a reasonable width in pixels. Then, click into the height field for it to automatically update to the corresponding height of the image’s aspect ratio. You may ignore the ‘Create a Copy’ option. Click the ‘Resize’ button.

Once the image is resized, click the ‘Select’ button denoted with a check mark.
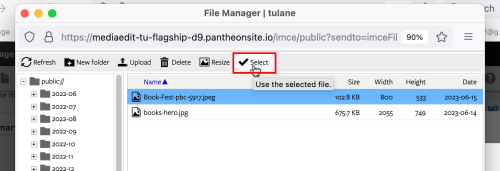
- After uploading and resizing the image using IMCE file manager, you will then return to the edit media modal/dialog where you may then crop the image if desired, save those changes and embed the adjusted media on the page.
The ‘Edit media’ option for embedded media also offers image alignment options, an image caption option, and a required alternate text field.
Removing an Image Added to the Body Field
To remove an image media type added to the Body field, do not remove by clicking ‘Edit this media’ and then clicking the ‘Delete’ button on the next dialogue box. This will remove the image completely from the site, not just the page.
To remove the image:
- simply click to select it, right click, and select cut.
- Or, place cursor directly below image, and press delete to remove the image, as if it were text.
