Creating a New Landing Page:
- Click Manage on the top black nav menu
- Click Content on the white sub-nav menu
- Click +Add Content at the top
- Click on Full Width Template
- Fill in the following required fields: Title, Body
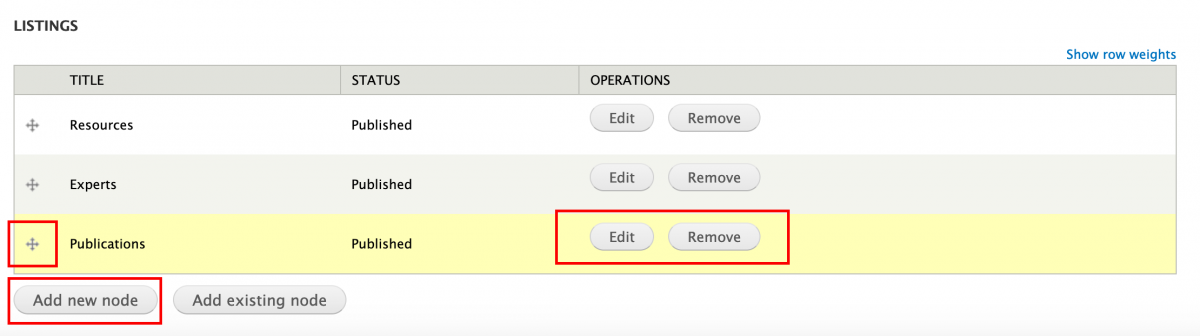
You can use as many nodes (or tiles) as you'd like. Nodes display in rows of 3.
Pre-sized 800x600 images are available in the collections below:
Campus Beauty
COVID-19/Return to Campus
- Click Add New Node button and fill in the required fields: Title, 800x600 image, Link (short description/teaser is optional)

- Click Create Node button below the Teaser field. Repeat these steps for each additional node/tile you'd like to include on the page.
- Click Save button at bottom of page.
There are 6 heading sizes within Drupal. Heading 1 <h1> is the page title's size. It should not be used within the body field.
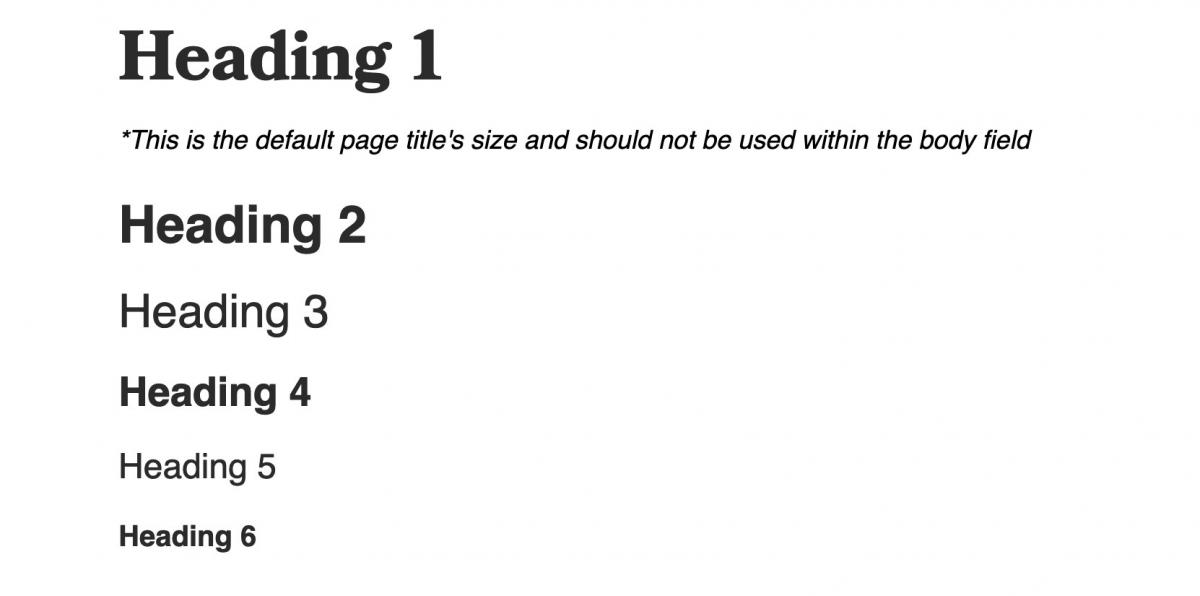
To change your text to a header size, click the Normal dropdown menu on the body field toolbar and select the heading size. As a rule, headers should descend in size as you move down the page.

Useful tools within the Body field
- Image Upload icon
- Link icon for linking to pages outside of your website
- LinkIt icon (has a + sign) for linking to pages within your website
- Templates icon (first row, top right) – has column templates, accordion menu template etc
Adding a new page to your navigation menu
If you want this page to live on your menu, check off “Provide a Menu Link” below the body field.
Go to the Parent Item dropdown and select where you want this page to live (what parent page should it live under?)
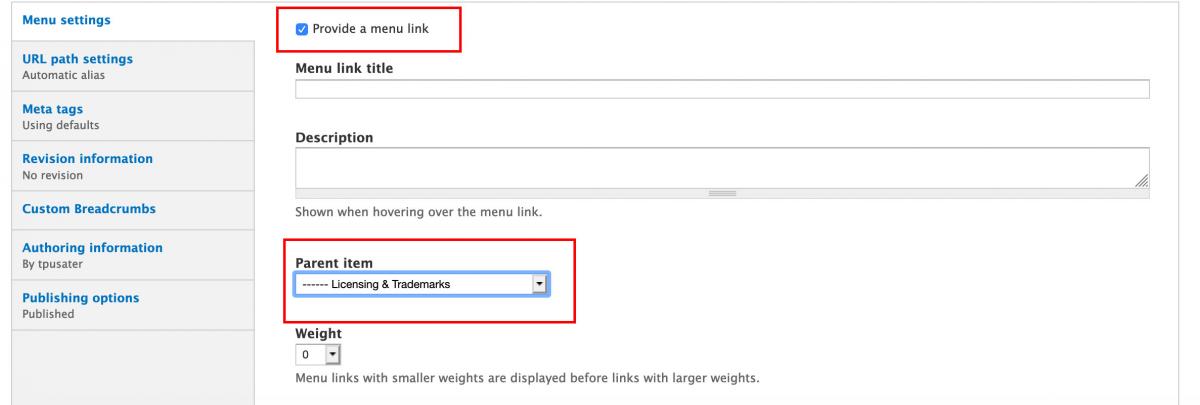
**If it should live on the green primary navigation, then select “Primary Navigation” as the Parent item.
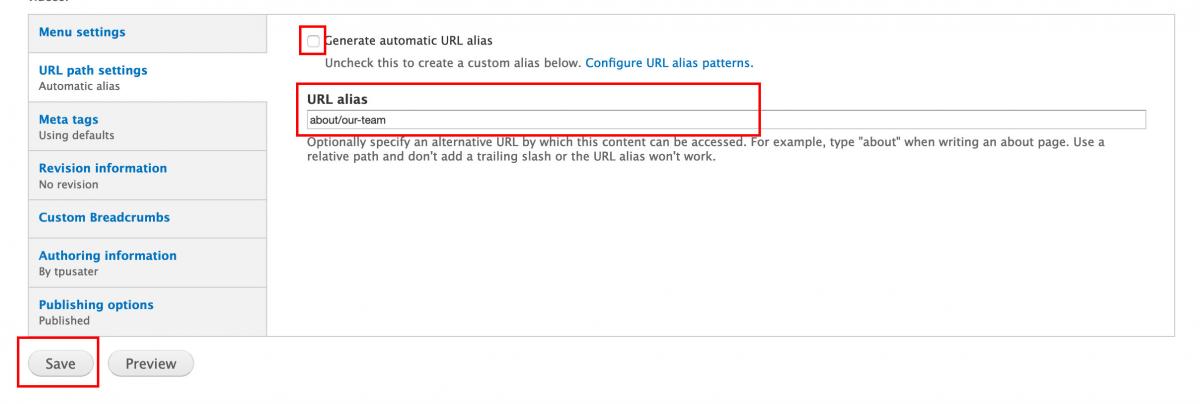
If you have created a new page, you need to customize the URL:
At very bottom of page under Body field, Uncheck “Generate automatic URL alias” box and manually type in your custom URL path in the URL Alias Box below. Do not put a / in front.
Example: You’ve created an Our Team page under About section of your site. Your URL path could be entered in the field like this: (no / in front of the first word, all lowercase)
about/our-team
Example: You've created a new primary navigation menu item called About. Your URL path could be entered in the field like this: (no / in front of the first word, all lowercase)
about
**If you saved the page first and forgot to change the URL path:
- Click Content on top bar
- Click edit next to that page title
- Scroll down to bottom left sidebar – click “URL Path Settings”
- Change URL path
Click Save at bottom
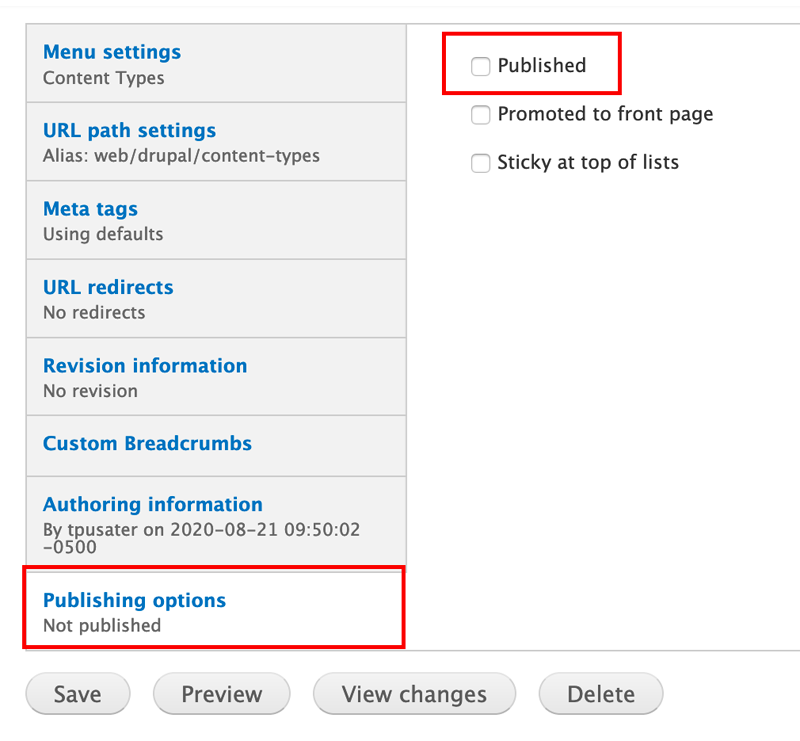
By default, when you create a page and click Save, the page is published and "live."
If you added the page to a menu, then the public can find your page right away on the navigation menu.
If you did not provide a menu link, the page is live, but no one will be able to find it on your navigation menu. A person could access it via search or by having the direct URL link.
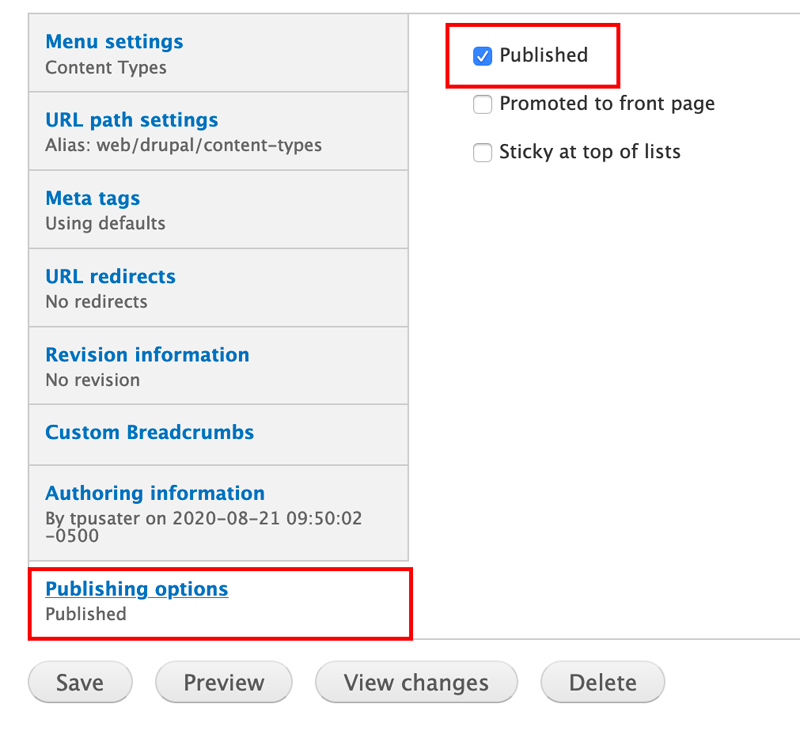
If you are working on a draft and would rather keep the page unpublished, click on "Publishing Options" in the bottom left sidebar and uncheck Published. Then click Save button.
Note: The page's background will be a light pink to denote that it is unpublished.
Editing a Landing Page:
Unlike Universal pages, you cannot navigate to a landing page and use the editing gears to edit the page. Instead, follow these steps to edit a landing page:
Click Content on the white navigation bar. Use the search bar at the top of the page to filter by:
- Title
- Page Type - select "Full Width Template"
- Author
- Published or Unpublished
- Vocabulary
Then click the Apply button to see a list of filtered results populate below. Once you find the page you want to edit, click edit to the right of the page title.
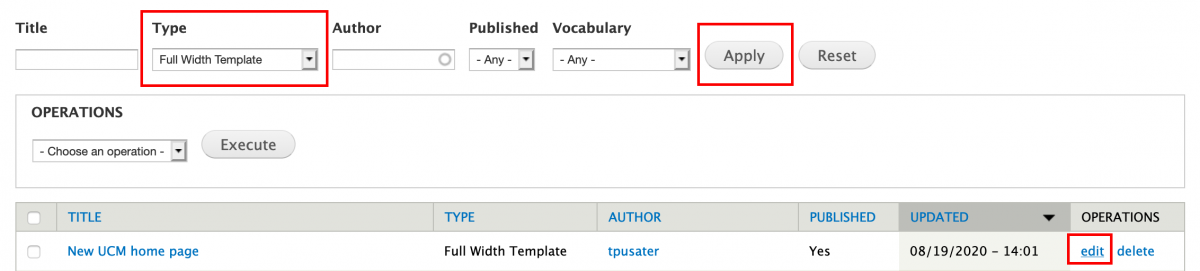
You can re-arrange existing nodes with the drag and drop tool or edit/remove nodes by clicking the button to the right of each one.